Christmas Stockings for Soay Shepherds: A No-Spill, All-Purpose Feed Bag
Looking for a gift for your favorite shepherd, especially a slightly clumsy one? Can you sew a straight seam? I have just the one-hour project for you.
Experienced shepherds, of Soay sheep or otherwise, and almost any do-it-yourselfer will sympathize with what I am about to say. When you feed your livestock guardian dogs in the pasture, there is nothing more annoying than to have your bucket tip over, requiring a trip back to the barn for more goody. Not the kind of catastrophic event that puts a flock in jeopardy, of course, but enough to make you grit your teeth and who needs that?
Same thing if you are in the midst of a home fixup project, your selection of nails-in-old-coffee-cans is sitting on the workbench, and your sweatshirt sleeve knocks a couple of them over onto the floor. Or you are trying to repair a fence and your can of fence staples tips over in the lush pasture grass.
No-spill dog feeding bag
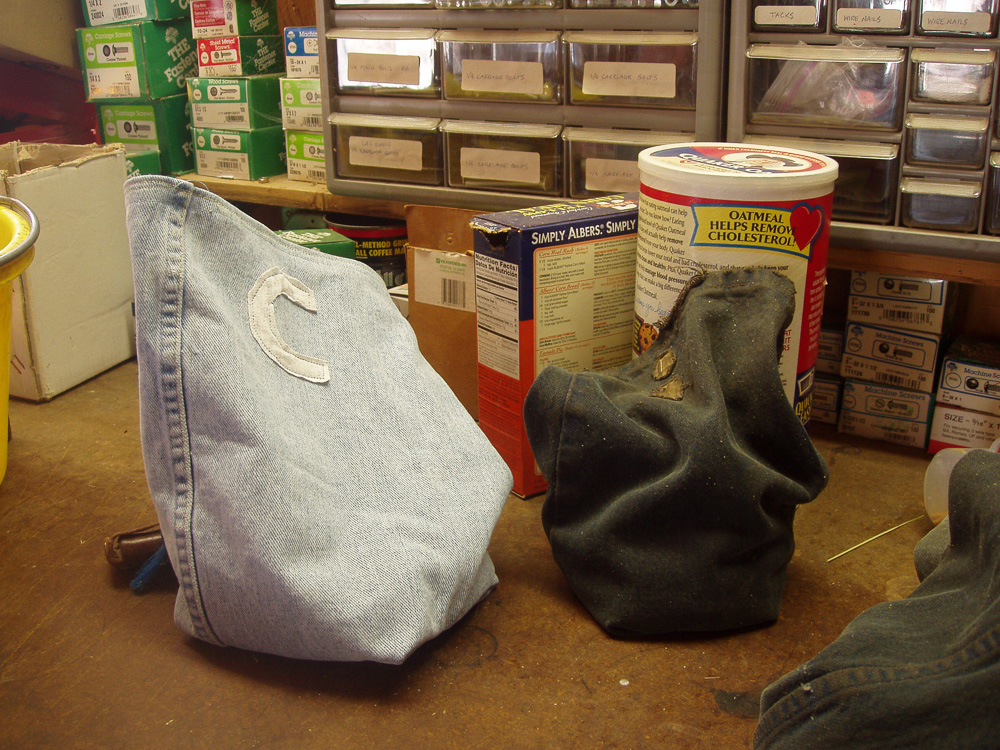
Wouldn’t you rather have a no-cost, tip-proof container for this stuff? Luckily, as with so many other aspects of keeping a flock of Soay sheep, help is readily at hand, this time in the form of a square-bottomed cloth bag, a transportation system for your dog food or nails that cannot tip over and spill. Here are two of our dogs’ “stockings” filled with half their daily ration and ready for the evening feed:
As you can see, Chuy and Isaac’s stockings are tip-proof. You just pick them up and off you go.
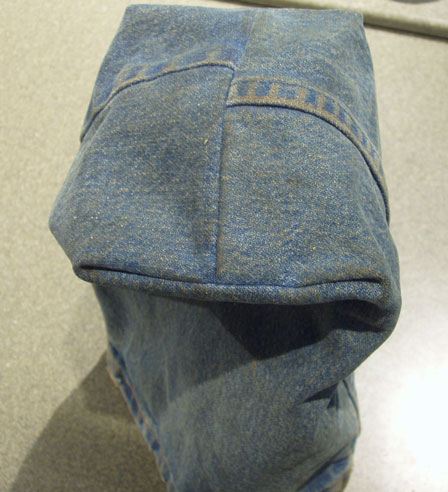
Square-bottomed, stable food bag
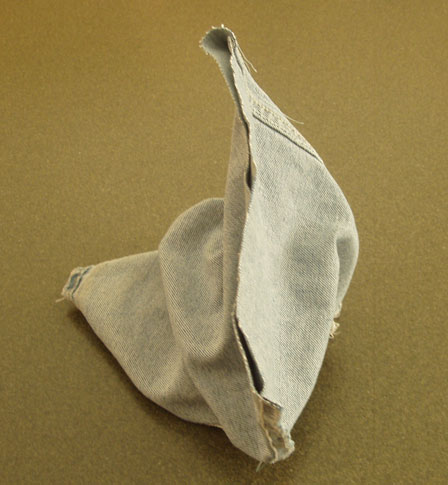
Why don’t these bags fall over and spill? The secret is in the square-shaped bottom end, illustrated by an upended bag. The bottom really is more or less a square, and whatever its geometrically accurate name, that bottom surface keeps it upright just fine. In fact, when the top of a longer bag droops over, it helps keep out rain, dust, and inquisitive border collie noses.
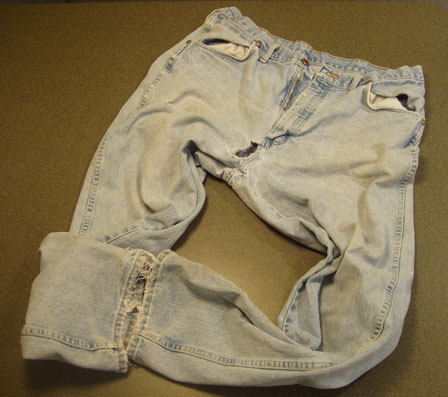
Steve’s jeans ready for reincarnation
The ideal raw material is old jeans, so heavily worn that the owner can no longer go out in public in them (holes you-know-where) or torn enough to make them unsafe to wear near moving machinery parts. And there is a side benefit. If you do not make bags out of them, you eventually will have to throw the jeans away, so these sewing projects should qualify as “green” even though they are a sorry excuse for blue.
The only other materials you need are a sewing machine, a few straight pins, and any color thread. No zigzag or button hole or other “foots” to discourage the novice seamstress in this project.
Before I launch into the illustrated directions for making a square-bottomed feed/nails sack, a credit is in order. We adapted this idea from generations of rock climbers, including Steve in his younger, more agile days, who use stuff sacks to keep their carabiners, pitons, ropes, and legendarily minimal toiletries organized in their backpacks. You can still find this kind of sack in outdoor gear stores, but you will pay a relative arm and leg for them, and why not use your own free jeans legs instead?
Making the Saltmarsh All-Purpose Carrier
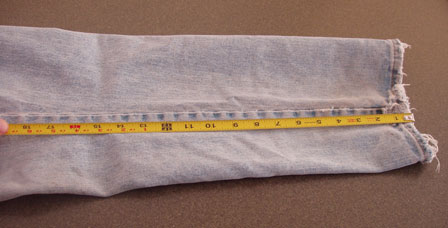
Measuring height of bag
Step 1. Cut one leg off the jeans, leaving the bottom hem intact, or what passes for intact. An initial length of about 14 inches will yield a bag about 10 inches tall that easily can hold a quart and a half of dry dog food or a coffee-can’s worth of nails and still have enough fabric to grab onto.

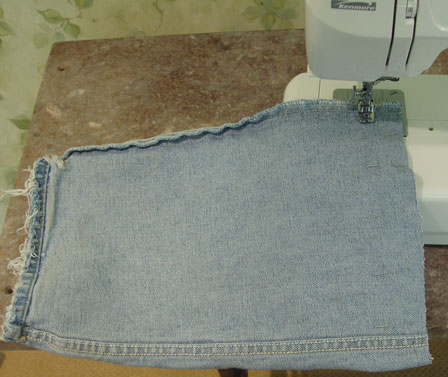
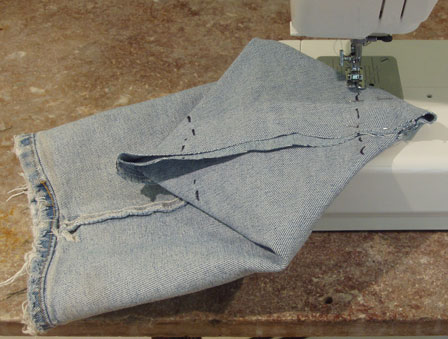
Turn jeans leg inside out
Step 2. Turn the severed leg inside out and lay it flat with the existing side seams more or less forming the edges. If you are using a tapered jeans leg, this will not be an exact science.
Sew the open end (not the already-hemmed bottom edge of the leg) shut with a plain straight seam about one inch from the raw edge. Here’s what the prepped material looks like and how you sew it:
Sewing first seam

Close-up of first seam
Set up for square base
Step 3. The goal now is to create a box-shaped bottom that will not tip over. First, put the new seamed edge in front of you running vertically — up and down.
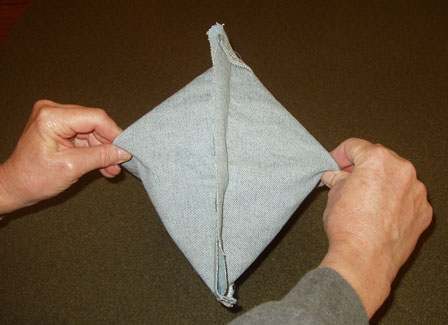
Making the square
Grasp some material on either side of the seam and pull outwards to form a diamond/box shape. You want to turn the pointed ends at the top and bottom of the diamond into the sides of a square, which, when you turn it back right-side out will form a box. Take my word for it, please.
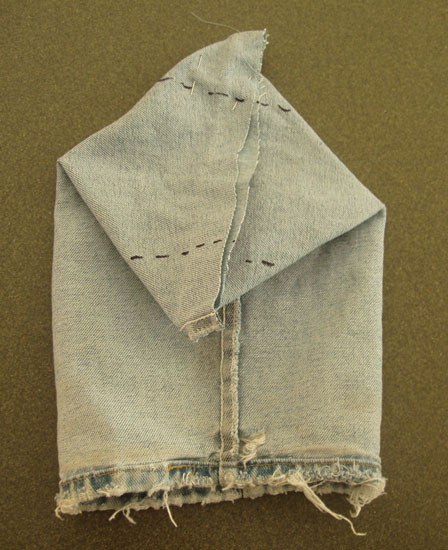
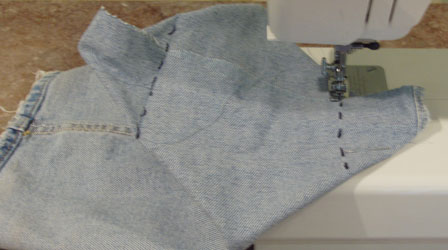
Marking off the square
Figure out where you can hem crosswise to create the sides for your box. In the following picture, I have marked with a black dotted line the two “sides” you will create by sewing these two new seams. I recommend you mark yours as well, unless your dogs will be offended at having the seams of their stockings show. We girls endured black-seamed stockings for decades without permanent emotional damage, as I recall.
Now sew each of the marked seams. You will be sewing through quite a bit of heavy fabric, so use a heavy needle and your trusty straight pins. Be patient and gently work the machine through the material. Don’t forget to sew both seams.
Sewing first box side
Sewing second box side

Checking your work
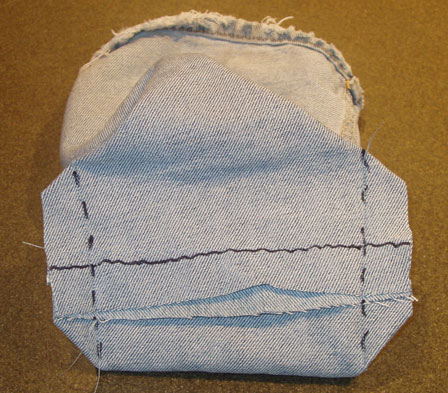
Here is what it looks like, still wrong side out, when both “sides” have been made. For reference, I marked the very first straight seam with a wiggly line so you can see how the various seams fit together.

Looks like a square to me
Once you’ve got both seams done, turn the whole thing right side out again. Nudge the fabric into the corners to see if you have made two decent-looking square corners. We’re not talking engineering precision here, just something that will work.
Step 4. To check your work and my directions, fill the bag with some rocks or beans to be sure it is stable. Hint: it will be!
To tidy up the inside of your new stocking and leave more room for goodies, turn it inside out one more time and trim off the extra hunks of material, always leaving about an inch of material outside the seam so it will not ravel.
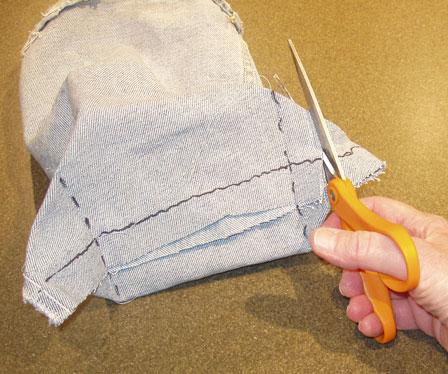
Trimming one side
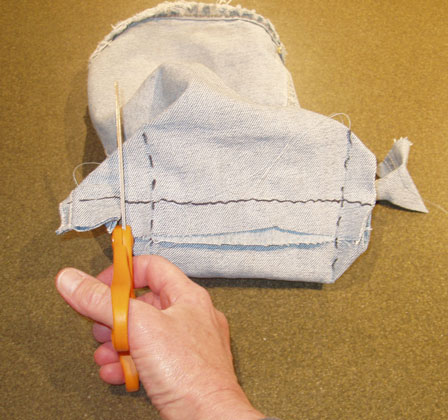
Trimming second side
All tidied up and ready for work
Be careful, of course, not to cut off the working parts, or you will dribble dog food down the lane and have nothing left for your loyal protectors to eat. Turn the whole thing right side out one final time, wrap it with festive Santa wrapping paper, an artsy bow, and you’re all set.
Accessorizing your stocking.
What, you thought I was going to stop at the basic bag? Not a chance.
Monograms. If you have two or more dogs who eat different kinds or amounts of food, or more than one kind of nail, you can make a good-enough identifying monogram by cutting an initial (as in “i” for Isaac or “C” for Chuy) from any contrasting scrap of cloth you have lying around. Sew it on near the open end of the bag, high enough to let you slip the open end of the bag over the sleeve arm of your sewing machine.
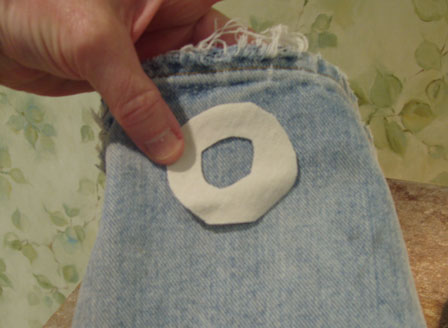
“O” is for ?
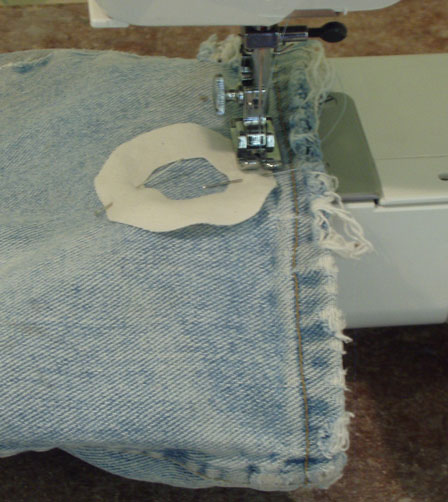
Attaching O-ring monogram
This one would work nicely for oatmeal for the birds, or a sack of “O” rings if you are putting together your own satellite.
Drawstrings. In the days of yore, pre-velcro, the climbers’ stuff sacks had drawstrings with jim-dandy clamp-like things to keep them shut. Are you are going for the Martha Stewart award here? If so, you can add rickrack, or use extra jeans legs for fireplace sachets (I am not making this up), or you can add drawstrings by cutting off the hemmed bottom edge of the jeans and making your own open-ended, tube-like hem, with those little slits for threading through a drawstring, etc. Personally, I would rather clean gutters than thread drawstrings through anything, much less a jeans leg, but if you’ve got a good movie to watch, have at it.
Once you figure out how to make these bags, you can crank them out in assembly line fashion and have a selection of sizes to pick from when you need to take a handful of insulators, a few nails, and a spool of electric tape out to work on your fence, or when you need to take a couple of irrigation pipe fittings and a small or medium-sized wrench or two out to a malfunctioning riser or rainbird. And when the winter rains or snow arrive in earnest, you can fritter away whole days re-organizing your nails, nuts and bolts, screws, all those PVs (Potentially Valuables) in your tool shed.
If I don’t get back here before the end of the year, may your Christmas stocking be coal-free and not tip over.
Happy holidays!